Pegas SmartSelections & CAM — User Guide

Version 1.0 · Autodesk Fusion 360 (Add-in) · Pegas Tools


1. Introduction

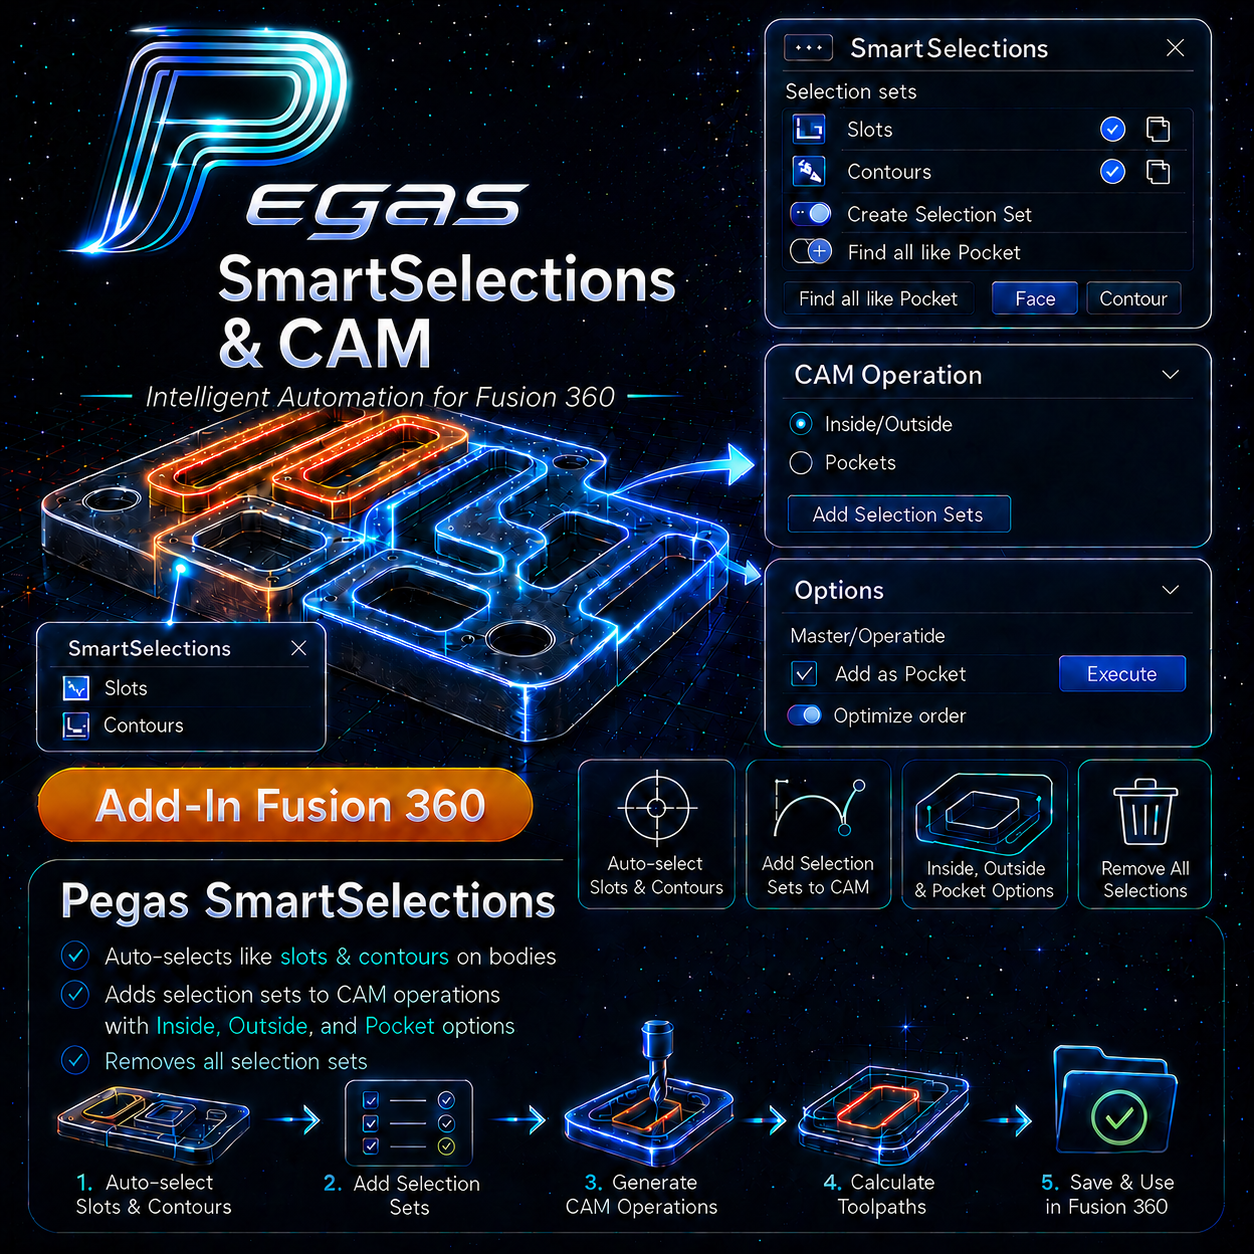
Pegas SmartSelections & CAM is a professional utility that streamlines toolpath programming in Autodesk Fusion 360. If you are tired of manual clicking and want to know how to select multiple slots in fusion 360 cam, this add-in is the solution.

When designing flat-pack cabinets or nested layouts, designers often face the issue where fusion 360 cam geometry lost on model change nested panels occurs, forcing them to re-select slot profiles over and over. When you have dozens of grooves, doing manual slot selection too slow cabinet slots is a major bottleneck. You also risk getting a missing geometry warning fusion 360 cam toolpath regeneration error, or having to waste time re-selecting edges after model edit batch cnc routing runs.

The add-in resolves this by allowing you to batch select slots for toolpath fusion 360 cabinet slots setups, run a fusion 360 select all similar curves sketch nested panels routine, and determine how to select multiple slots in fusion 360 cam pocket milling operations. By grouping these curves into named sets, you can fusion 360 select similar contours cam inputs in one click and speed up toolpath geometry selection across multiple design iterations.


2. Installation

  1. Download the add-in archive from your account at pegastools.com.
  2. Unzip the folder to a location of your choice (e.g. Documents/Fusion360Addins/).
  3. In Fusion 360, open Tools → Add-Ins → Scripts and Add-Ins.
  4. Click the + button next to My Add-Ins.
  5. Navigate to the unzipped folder and select it.
  6. Check Run on Startup if you want the add-in available every time Fusion opens.
  7. Click Run.

A Pegas button appears in the CAM toolbar. Click it to open the palette.


3. Interface Overview

The palette contains six tabs:
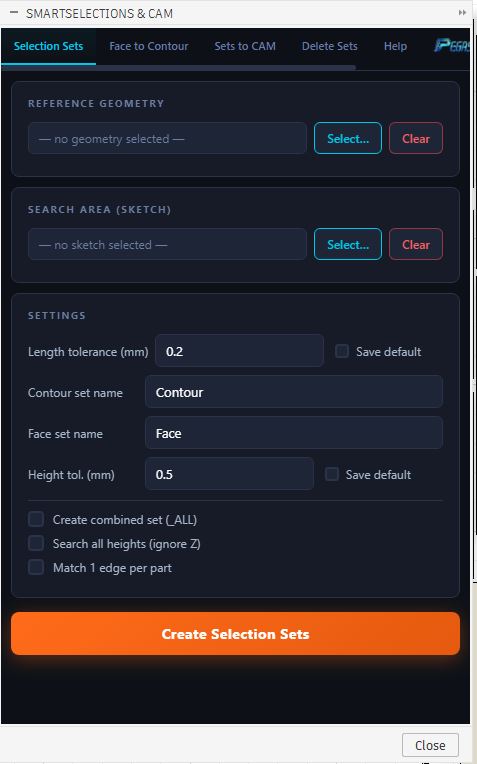
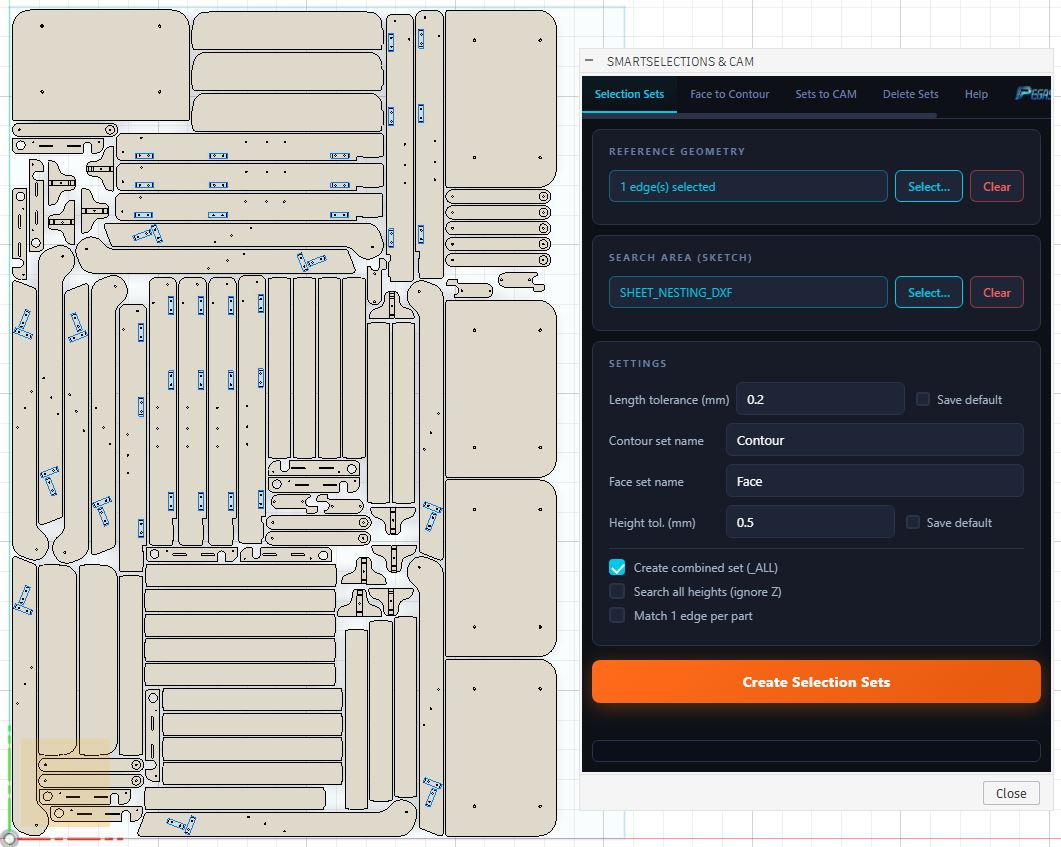
Contour Sets: Create and manage sets of edges / contours, including finding similar contours in a sketch by selecting a single reference slot.
Face Sets: Create and manage sets of faces.
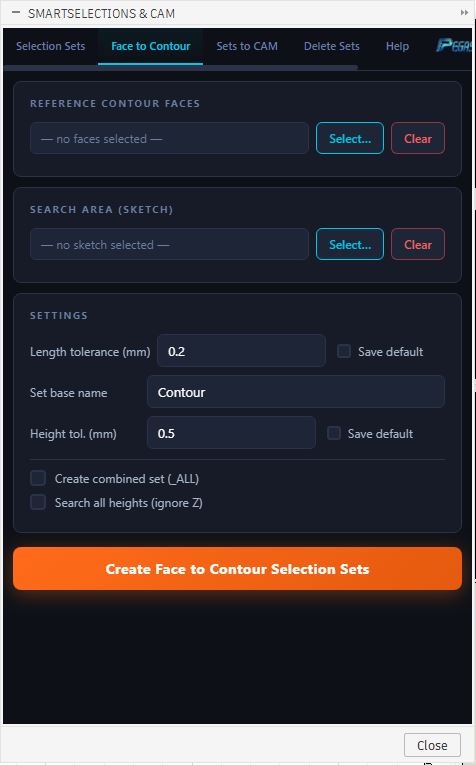
Face to Contour: Convert face selections into contour (edge) sets automatically.
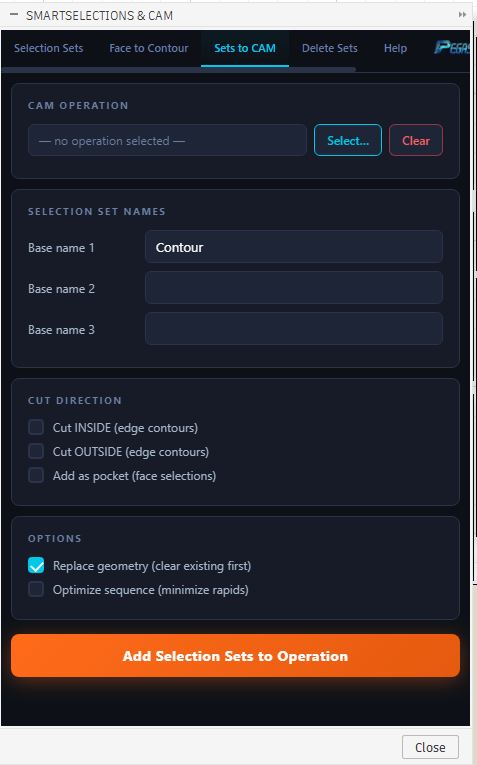
Sets to CAM: Apply saved selection sets to a CAM operation in one click.
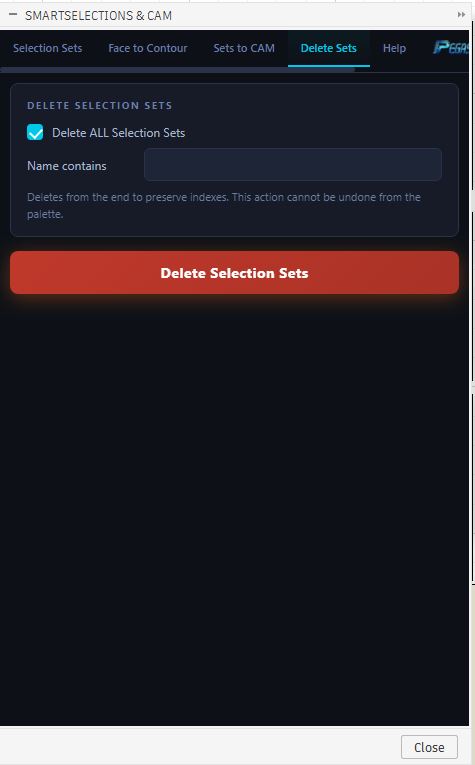
Delete Sets: Remove sets you no longer need.
Account: License status and account info.


4. Parameter Reference

The following parameters are used in the SmartSelections palette:

Parameter Type Default Range Description
Set Name String Empty Any unique name The name of the selection set (e.g., Shelf_Pins) to store in the design.
Select Geometry Selection None Edges, curves, or faces Viewer selection input for manual selection sets.
Reference Contour Selection None 1 Closed Loop Sample edge or curve used as a template to find matching geometries.
Target Sketch Selection None 1 Sketch The source sketch containing the patterns of slots or holes to scan.
Cut Direction Option List Outside Outside, Inside, Raw Sets the tool offset compensation relative to the contour boundary.
Replace geometry Checkbox Checked Checked / Unchecked Clears old toolpath geometry before applying the new selection set.

5. Tab 1 — Contour Sets & Reference Matching

Use this tab to build named sets of edges and contours (open or closed loops).

Auto-Selection by Reference Shape

Instead of manually picking every slot, the add-in can find similar contours automatically:

  1. Open the Contour Sets tab.
  2. Under “Find Similar”, click Select Reference Contour and pick one edge or curve loop representing the slot.
  3. Click Select Target Sketch and choose the sketch that contains the slot layout.
  4. Click Find Similar — the add-in scans the sketch and automatically highlights all matching contours.
  5. Enter a Set Name (e.g. Shelf_Slots) and click Create Set.

All identical profiles are grouped under the saved Selection Set.

Manual Selection

  1. Open the Contour Sets tab.
  2. Enter a Set Name in the text field.
  3. Click Select Geometry and pick edges or sketch curves manually.
  4. Click Create Set to save.

6. Tab 2 — Face Sets

Use this tab to build named sets of planar faces or curved surfaces.

Creating a set

  1. Open the Face Sets tab.
  2. Enter a Set Name.
  3. Click Select Geometry and pick faces in the viewport.
  4. Click OK, then Create Set.

7. Tab 3 — Face to Contour

This tab converts face selections into contour (edge) sets automatically.

Workflow

  1. Open the Face to Contour tab.
  2. Click Select Faces and pick the faces you want to convert.
  3. Give the resulting set a name.
  4. Click Convert — the add-in extracts the boundary edges of the selected faces and saves them as a Contour Set.

8. Tab 4 — Sets to CAM

This is the core tab — it applies your saved sets to an existing CAM operation.

Workflow

  1. Open the Sets to CAM tab.
  2. Click Select CAM Operation and click the operation in the viewport or browser tree.
  3. In the Sets list, check the sets you want to apply.
  4. Configure options:
  5. Cut Direction: Outside, Inside, or Raw.
  6. Replace geometry: Checked clears existing geometry in the operation; unchecked appends to it.
  7. Click Apply to Operation.

9. Tab 5 — Delete Sets

Use this tab to remove sets you no longer need.
1. Open the Delete Sets tab.
2. Check the sets you want to remove.
3. Click Delete Selected.


10. Tab 6 — Help

Quick reference and diagnostics.
Tab descriptions: Short overview of each tab’s purpose.
Buy license: Opens the product page in your browser.
Documentation: Opens the online documentation.
Write verbose debug log: Enables detailed logging to debug/debug.log.

License Management Location

License management is handled by the separate Pegas Account Manager add-in (Pegas tab → Account Manager in Fusion 360), not from within SmartSelections.


11. Typical Workflow — Sheet Material Example

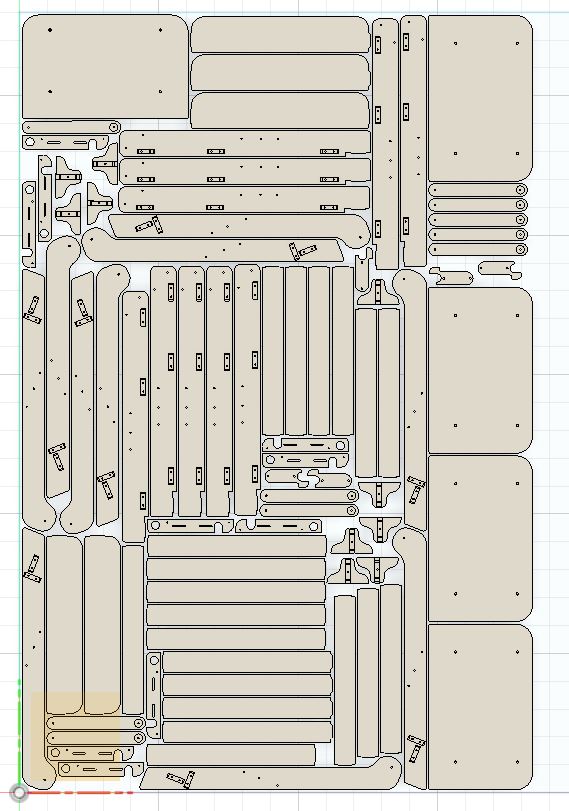
Scenario: A furniture panel with 12 identical shelf pin holes, 6 hinge pockets, and a perimeter contour cut. You run this job for 20 different panel variants.

Without SmartSelections: Every time you edit a panel and regenerate CAM, you manually re-select all 12 holes, 6 pockets, and the perimeter — repeating the same clicks 20+ times, with a real risk of missing one feature.

With SmartSelections:
1. On the first panel, pick one reference shelf pin hole, select the sketch, and run Find Similar to create the Shelf_Pins set instantly.
2. Create similar sets for Hinge_Pockets and Perimeter.
3. In Sets to CAM, assign each set to its operation.
4. For the next 19 panels: open Sets to CAM, select the operation, enable Replace geometry, click Apply. Done in seconds.


12. Frequently Asked Questions

Does the add-in modify my toolpath settings (feeds, speeds, depth)?
No. It only modifies the geometry input of the operation.

Can I use the same set in multiple operations?
Yes. A set can be applied to as many operations as you want.

What happens if I rename or delete geometry that a set refers to?
The set stores references to Fusion entities. If underlying geometry is deleted, those references become invalid. Recreate the set after significant design changes.

The Apply button stays in “Working…” state — what happened?
If Fusion encounters an error internally, the button resets automatically after 2 minutes. Check the CAM operation to see if the geometry was applied.

How does this compare to other CAM selection tools?
Unlike basic fusion 360 pocket selection scripts or legacy hsmworks select similar loops options, Pegas SmartSelections & CAM saves named selection sets directly inside the document. This lets you reload and apply selections parametrically when updating model designs, avoiding manual re-selection.


© Vikky Unipessoal LDA, Portugal | All rights reserved